linux解压zip文件的命令(Linux怎么解压zip到当前目录)
如需学习视频,请查看本头条号简介,免费在线观看学习视频
1. 前言
通常情况下,Linux系统并不会产生zip文件,而是由用户把zip文件上传到Linux系统中,产生解压的需求。
2. 安装zip解压工具unzip
以CentOS7.5最小化安装为例,系统并没有集成unzip工具,需要额外安装
[root@zcwyou ~]# yum -y install unzip
看到以下输出即代表安装成功。
Running transaction
Installing : unzip-6.0-19.el7.x86_64 1/1
Verifying : unzip-6.0-19.el7.x86_64 1/1
Installed:
unzip.x86_64 0:6.0-19.el7
Complete!
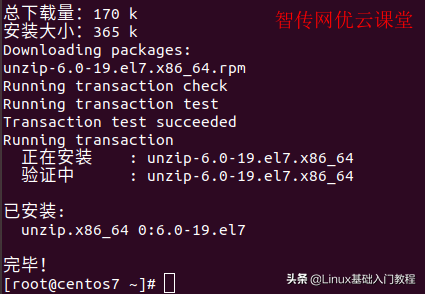
linux安装unzip
3. 解压文件
先查看一下压缩文件
[root@zcwyou zip]# ll *.zip
查询结果如下
total 4
-rw-r--r--. 1 root root 3032 Dec 4 17:14 zcwyou.zip
解压这个zcwyou.zip文件
[root@zcwyou zip]# unzip zcwyou.zip
执行过程如下:
Archive: test.zip
inflating: 333.txt
extracting: abc.txt
inflating: cisco1.txt
inflating: cisco2.txt
extracting: compress.txt
extracting: cp1.txt
extracting: cp2.txt
inflating: cut2.txt
extracting: cut.txt
extracting: diff1.txt
extracting: diff2.txt
creating: dir123/
extracting: hard123.txt
extracting: hard.txt
extracting: linux123.txt
extracting: soft.txt
extracting: test.txt
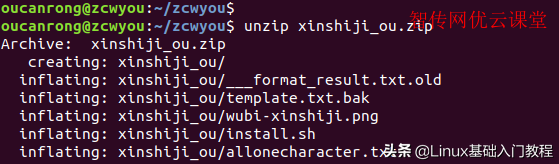
linux使用unzip解压zip文件
可以看到,unzip程序创建了一个目录dir123/,并且解压了一些文件。目录dir123是压缩文件里的一个目录。
检查:
[root@zcwyou zip]# ll
total 40
-rw-r--r--. 1 root root 315 Nov 27 16:15 333.txt
-rw-r--r--. 1 root root 9 Nov 21 11:39 abc.txt
-rw-r--r--. 1 root root 173 Oct 13 15:24 cisco1.txt
-rw-r--r--. 1 root root 179 Oct 13 15:24 cisco2.txt
-rw-r--r--. 1 root root 0 Oct 12 14:40 compress.txt
-rw-r--r--. 1 root root 0 Oct 11 10:23 cp1.txt
-rw-r--r--. 1 root root 0 Oct 11 10:23 cp2.txt
-rw-r--r--. 1 root root 57 Oct 12 13:45 cut2.txt
-rw-r--r--. 1 root root 50 Oct 12 11:59 cut.txt
-rw-r--r--. 1 root root 9 Oct 13 14:59 diff1.txt
-rw-r--r--. 1 root root 18 Oct 13 15:00 diff2.txt
drwxr-xr-x. 2 root root 6 Dec 4 17:06 dir123
-rw-r--r--. 1 root root 0 Nov 26 17:47 hard123.txt
-rw-r--r--. 1 root root 0 Nov 26 17:47 hard.txt
-rw-r--r--. 1 root root 0 Nov 29 17:25 linux123.txt
-rw-r--r--. 1 root root 0 Nov 26 17:47 soft.txt
-rw-r--r--. 1 root root 10 Nov 19 13:33 test.txt
-rw-r--r--. 1 root root 3032 Dec 4 17:14 zcwyou.zip
发现zcwyou.zip里的文件已经被全部解压出来了,并且保留了源文件zcwyou.zip。
解压其它例子
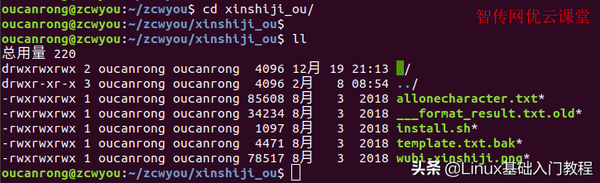
检查linux解压的文件
4. 其它实用案例
4.1 把zcwyou.zip解压到目录/tmp
[root@zcwyou zip]# unzip -d /tmp zcwyou.zip
4.2 解压不覆盖原有文件
[root@zcwyou zip]# unzip -n zcwyou.zip
4.3 解压到指定目录不覆盖原有文件
[root@zcwyou zip]# unzip -n -d /tmp zcwyou.zip
4.4 解压到指定目录并覆盖原有文件
[root@zcwyou zip]# unzip -o zcwyou.zip -d /tmp/
4.5 列出压缩包内容
[root@zcwyou zip]# unzip -l zcwyou.zip
4.6 查看压缩包信息,包括每个文件的压缩率和总压缩率。
[root@zcwyou zip]# unzip -v zcwyou.zip
Archive: test.zip
Length Method Size Cmpr Date Time CRC-32 Name
315 Defl:N 163 48% 11-27-2018 16:15 c785bec5 333.txt
9 Stored 9 0% 11-21-2018 11:39 b202eb3a abc.txt
173 Defl:X 120 31% 10-13-2018 15:24 ddc8760a cisco1.txt
179 Defl:X 121 32% 10-13-2018 15:24 c83f3111 cisco2.txt
0 Stored 0 0% 10-12-2018 14:40 00000000 compress.txt
0 Stored 0 0% 10-11-2018 10:23 00000000 cp1.txt
0 Stored 0 0% 10-11-2018 10:23 00000000 cp2.txt
57 Defl:X 40 30% 10-12-2018 13:45 cfaa04a8 cut2.txt
50 Stored 50 0% 10-12-2018 11:59 8bdf8936 cut.txt
9 Stored 9 0% 10-13-2018 14:59 d0864923 diff1.txt
18 Stored 18 0% 10-13-2018 15:00 12be2d98 diff2.txt
0 Stored 0 0% 12-04-2018 17:06 00000000 dir123/
0 Stored 0 0% 11-26-2018 17:47 00000000 hard123.txt
0 Stored 0 0% 11-26-2018 17:47 00000000 hard.txt
0 Stored 0 0% 11-29-2018 17:25 00000000 linux123.txt
0 Stored 0 0% 11-26-2018 17:47 00000000 soft.txt
10 Stored 10 0% 11-19-2018 13:33 769b1926 test.txt
820 540 34% 17 files
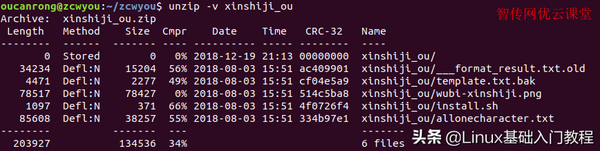
linux unzip查看压缩包信息
4.7 测试压缩文件
[root@zcwyou zip]# unzip -t zcwyou.zip
检验结果如下:
Archive: test.zip
testing: 333.txt OK
testing: abc.txt OK
testing: cisco1.txt OK
testing: cisco2.txt OK
testing: compress.txt OK
testing: cp1.txt OK
testing: cp2.txt OK
testing: cut2.txt OK
testing: cut.txt OK
testing: diff1.txt OK
testing: diff2.txt OK
testing: dir123/ OK
testing: hard123.txt OK
testing: hard.txt OK
testing: linux123.txt OK
testing: soft.txt OK
testing: test.txt OK
No errors detected in compressed data of test.zip.
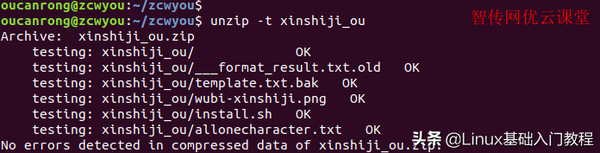
linux使用unzip测试压缩包
5. unzip命令的其他选项
[root@zcwyou zip]# unzip -h
-p 解压文件到重定向到pipe,但不显示信息
-l 列出压缩包里所有的文件
-f 更新压缩包内已有的文件,但不添加新文件
-t 测试压缩包
-u 更新压缩包内已有的文件,并添加新文件
-z 仅显示压缩包文件的备注信息
-v 打印详细的执行过程。
-T 解压时更新文件时间至解压时间
-x 指定解压哪些文件
-d 解压时创建新的目录
修改参数:
-n 不覆盖文件
-q 静默模式
-o 静默替换
-a 自动转换文本文件
-j 不处理压缩文件中原有的目录
-aa 把所有文件当做文本文件
-U use escapes for all non-ASCII Unicode
-UU 忽略任何的Unicode字段
-C 压缩文件时区分大小写
-L 把压缩文件里的文件名全部变为小定
-X 存储UID/GID信息
-V 保留VMS版本号
-K 保留setuid/setgid/tacky权限
-M 把输出结果交由more打印
-O 指定字符编码为 DOS,Windows 和 OS/2
-I 指定字符编码为 UNIX编码
总结:zip文件一般由Windows系统压缩,并上传到Linux系统上,Linux系统使用unzip解压缩,如果发生乱码,需要使用选项-O指定字符编码,比如GBK,GB18030.
点击了解更多,快速查看更多的技术文章列表。